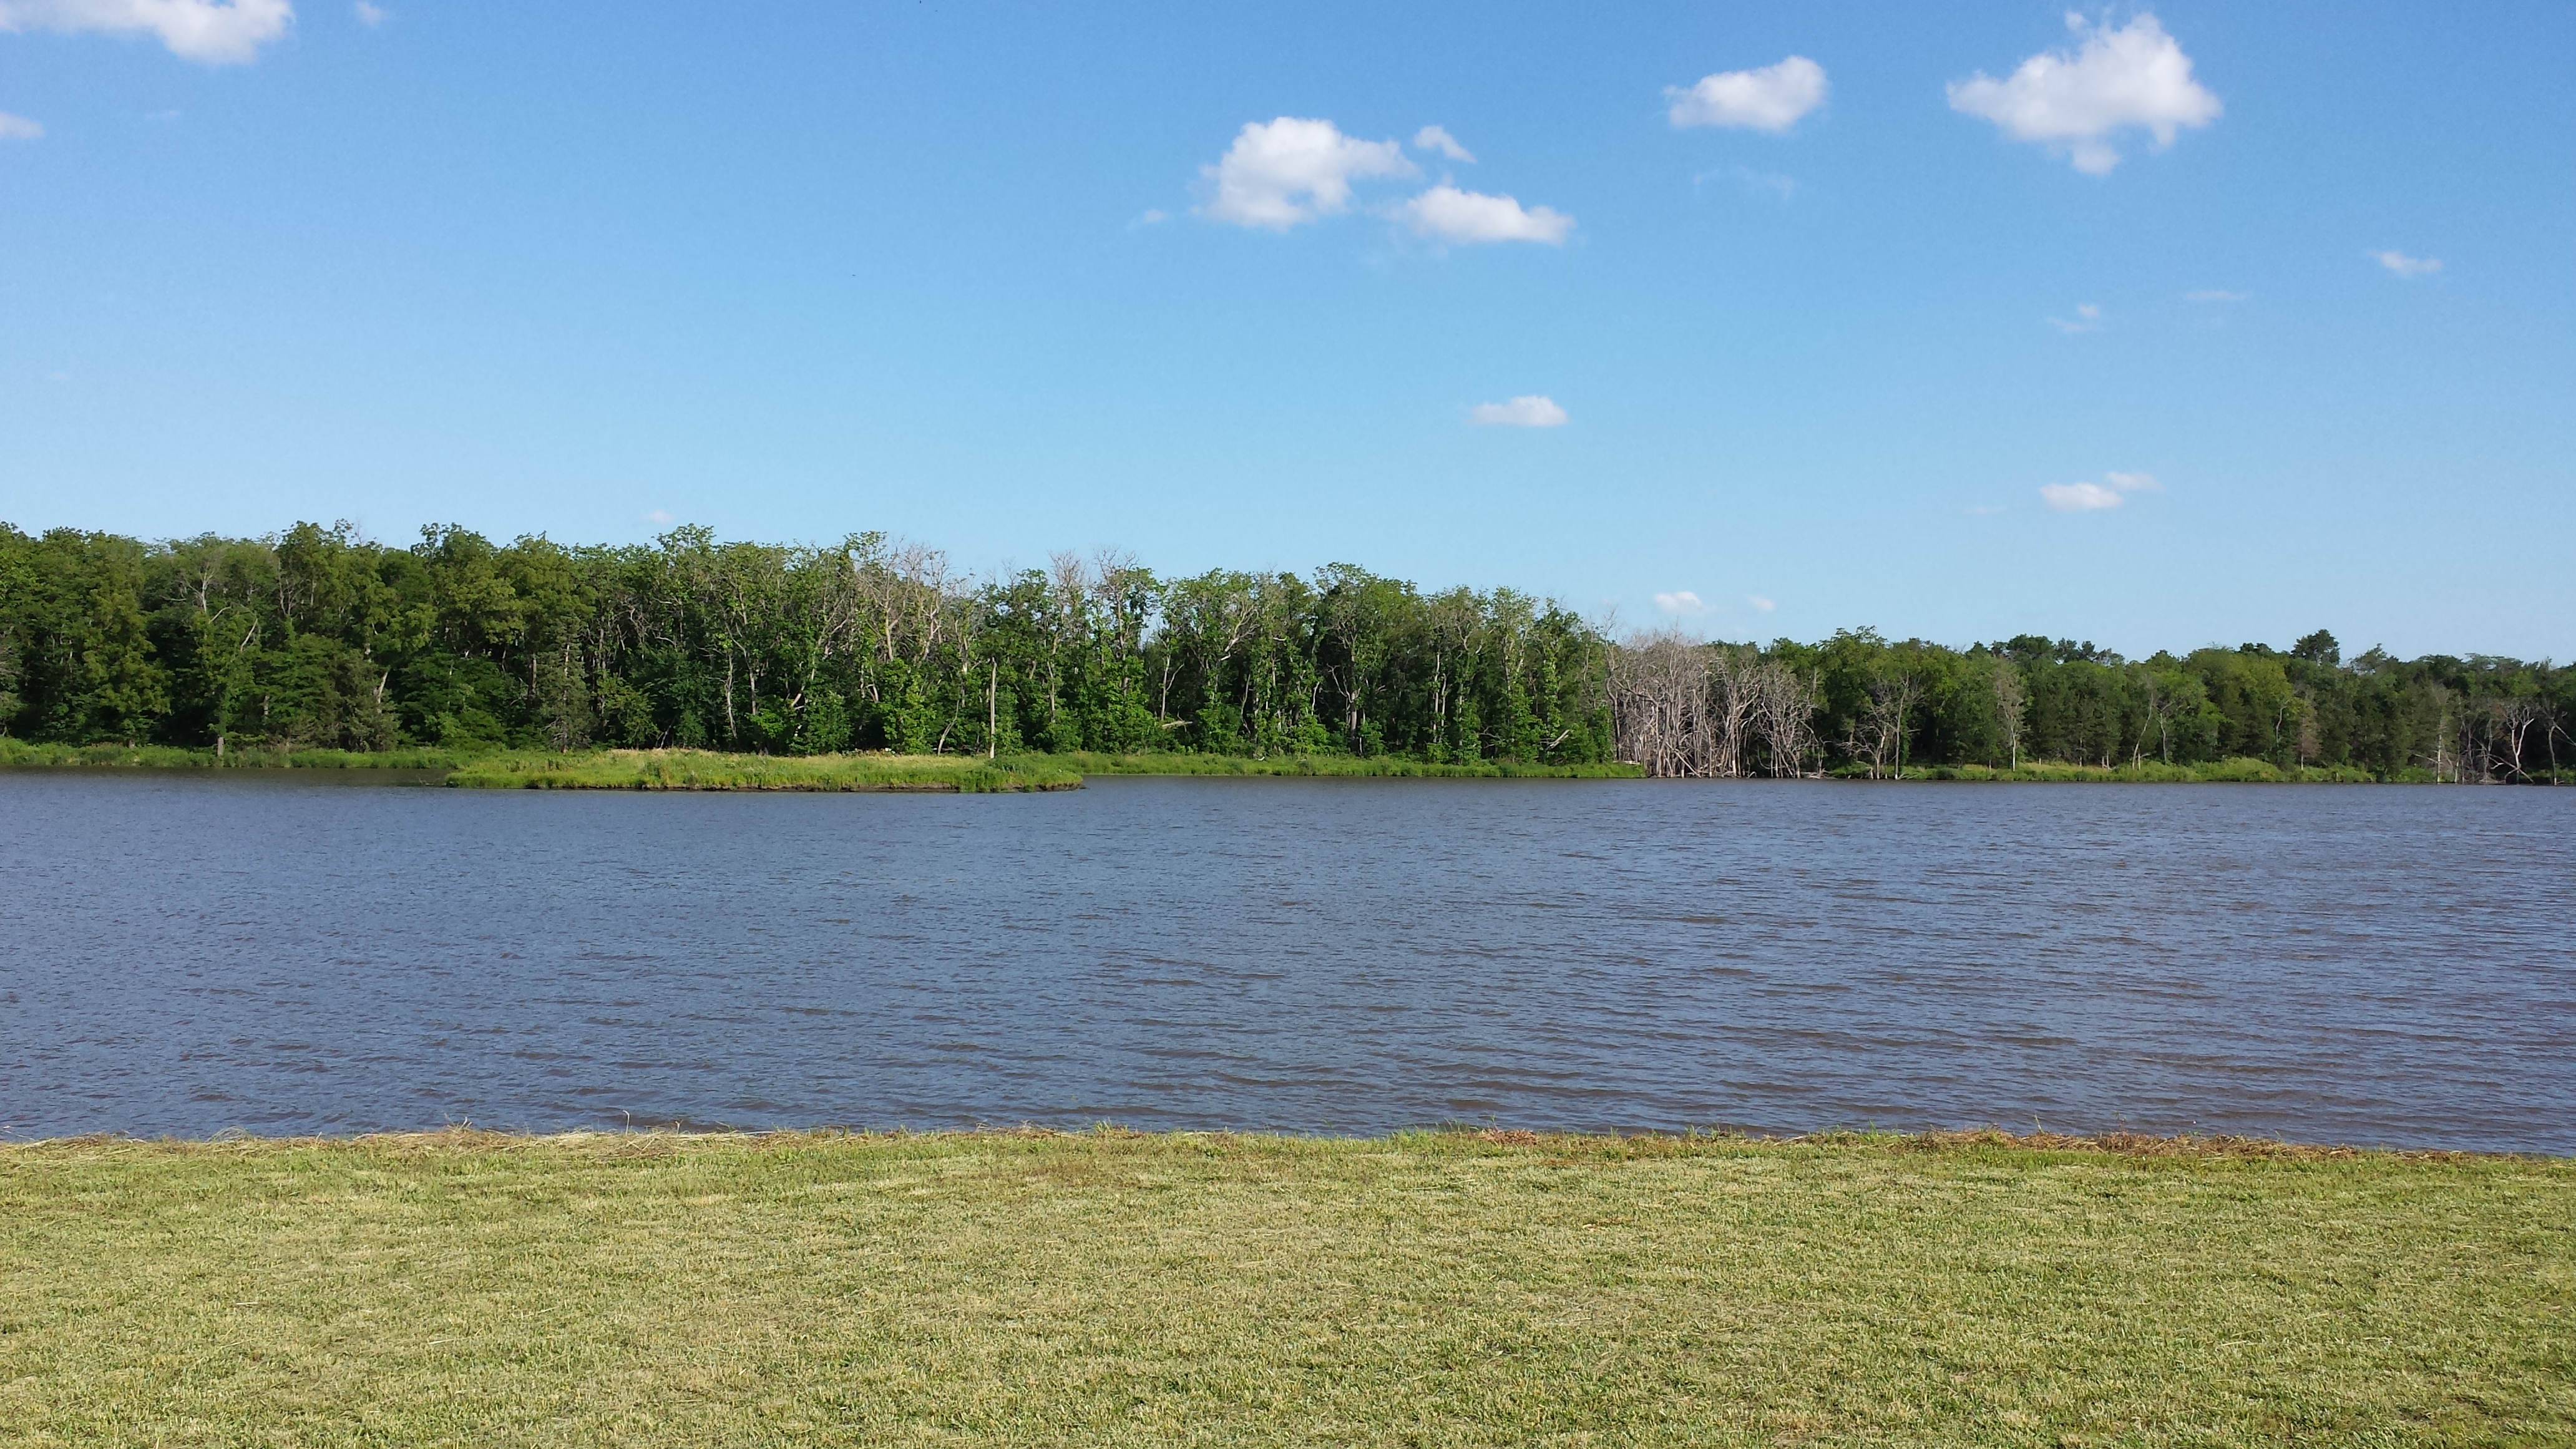
A friend whose family has access to a fairly large pond invited me and a group of friends out for a day of swimming and boating. While out enjoying a lovely Kansas day, I found a spot on the pond — an island — that I thought would make a perfect spot for a geocache. In general I’m a fan of caches that are fun to get to but not super hard to find (no one wants to hike 8 miles and then spend three hours looking under rocks) so this island would be perfect — the cache wouldn’t be too hard to find, but it wouldn’t be a park and grab either.
While a lot of places sell “waterproof” containers, most are built to get splashed, or maybe briefly dunked. But when you’re hiding a geocache in a pond where it could potentially be submerged for months at a time, not to mention frozen in the winter and baked by the sun in the summer, you’ll need a stronger build. I decided to make my cache out of PVC, and I wanted to explain how I went about doing that. I should preface this post by saying that I really have no experience with plumbing in general, so this post is written assuming no expertise, and if you see anything that can be improved let me know.
Parts list
These are just the parts I used, most of them could probably be substituted for similar things — in particular the ginormous tent stakes were only necessary because this cache is going into some pretty deep mud:
- 1″ PVC pipe (2′ length) ($1.96)
- PVC Cap (66¢)
- PVC Thread Adapter (Male) (66¢)
- PVC Thread Cap ($1.26)
- Thread Seal Tape (99¢)
- PVC “Purple” Primer (8oz.) ($5.37)
- PVC Cement (Waterproof) ($6.87)
- 3/32″ Coated Steel Cable (4.5″ length) ($1.62 @ .36 x 4.5)
- Wire rope clamps ($2.62)
- Carpenter Pencil (19¢)
- Waterproof paper ($4.95)
- 16″ Tent Stake (x2) ($7.96 @ 3.98 x 2)
- Lego Pirate (to captain the ship)
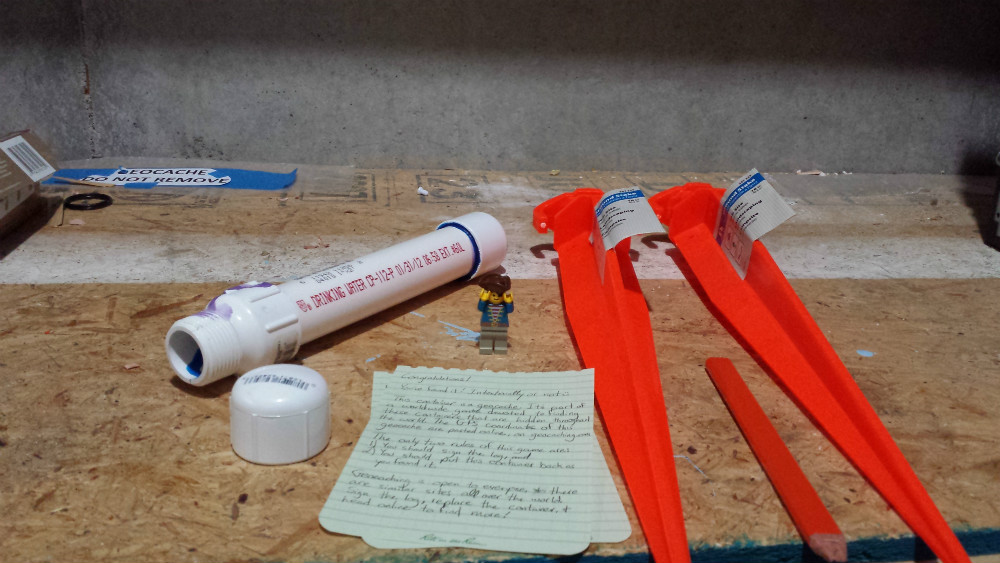
Here’s a picture of the parts that went into my geocache (except instead of thread seal tape, I have a small tube of dope in this picture — I ended up returning it and getting some tape before I built the geocache):

Building the Geocache
Once you have the parts, putting everything together is pretty straightforward. There are really only three steps:
- Cut the PVC pipe to a more usable size. I chose around 8″ because that would give me enough room to store the pencil and Lego guy.
- Glue the end cap and the thread adapter onto the pipe. Being a PVC noob, I found this video pretty helpful. Basically, you…
- Apply some primer to both the male and female sides of the joint.
- Apply some cement to both sides.
- Join the two sides of the joint with a 1/4 turn and hold them together for a few seconds (the video says 5ish, the cement can says 30) so they don’t come apart.
- Secure the steel cable to both the pipe and the stakes.
- I used a noose knot to secure the cable to the pipe, and made sure it was tight enough that it wouldn’t slip over the the caps. Though the steel cable is kind of tough to work with, its inflexibility helps make it harder to slide over the cap end.
- Once you have the knot tied, apply one of the clamps so it can’t come undone — basically you can just clamp it right next to the knot.
- I used another noose knot to secure the cable to the stake, although I think the knot choice is probably a lot more flexible here. I was originally planning on tying the knot through the loop at the top of the stake, but if you look closely there are actually small holes just below the top of the stakes, and the cable I had fit perfectly through these so I ran the cable through them instead.
- Finally, use the other clamp to secure this second knot.
Once all of this is done, you just need to write / print a “Geocache Note” (see the right-hand column of the Hide & Seek a Geocache page). Since I was using waterproof paper, I hand wrote my note. Here’s a picture of the trimmed, glued-together cache and note (I should’ve taken this picture after I tied the cable on — sorry that step is not photographed here):
Placing the Geocache
Once everything is built, putting the geocache in the ground is the easy part. Some friends and I found a nice spot on the side of the island — an 8″ vertical, muddy wall — that wouldn’t get stepped on (whether you were walking on the island or wading through the pond) and wouldn’t interfere with boating. Then all we did was drive in the stakes, wind the geocache around the hooks on their tops (similar to the cord on a vacuum cleaner) and call it good.
So that’s all there is to it! If you have any questions or feedback, let me know in the comments!
Leave a Reply